I've gone and bought this crappy CX500, with the intention of making something that looks a bit better! Hopefully the maggot won't turn into a fly!

Not only is this my first attempt at a blog! but it's also my first attempt at creating a"custom" motorcycle!! I don't really know what I'm doing in either case, so we'll see how it goes.

You'll have to look at the photo below to see why I chose the 'maggot'!.........see something good can be found in everything!!

Wrenchmonkees CX

Wednesday, 9 May 2012

Rebuild & distraction

It was Bank Holiday last weekend & I made a start on getting the engine buttoned up, as the new oilseals had arrived. Got most of it done but I need to  slightly relieve the hole that takes the mechanical seal, as the ones supplied nowadays are fractionally larger than the originals.


We also have a new addition to the family!!

Friday, 27 April 2012

The Good the Bad & the Ugly!

The Good - I went round to my chum Les's over the weekend to start on some of the little welding jobs, we fixed the seat strap to the frame, filled in the small slit in the seat pan & plated the cut frame rails, although we will need to come back to some of it as we ran out of time.


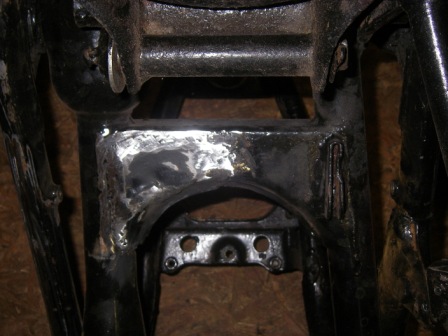
The Bad - When trimming & cleaning the frame plates I turned the frame upside down to get better access & discovered some rusted out holes in the frame & a shitty repair patch on the underside of the swinging arm! More fixing up required then!!


The Ugly - Thought I'd start cleaning up the surplus to requirements tabs & brackets whilst I was at it! The inside of the pillion footrest hangers look like they've come up from the fugging Titanic!!


 Oh well, onwards & sideways as they say!

Wednesday, 18 April 2012

Slow again!

Things have slowed down again! but I have received a few goodies recently! 

I decided to include a couple of sensible upgrades, one is to convert to an electric fan instead of the direct bolt on fan, to release loads of extra horses!! (yeah right!) so a fan from a VFR750 has duly been purchased, and is waiting to be bolted to the radiator. 


I also decided to replace the aged CDI unit with a modern replcement. Thanks goes to Cobram of the CX/GL Forum http://cx500forum.com/ who organised a group buy at a good discount from the standard price, although I did get stiffed by customs for an extra 20 quid tax!

There is a connection that allows you to plug the unit into your PC & screw up the progamming/mapping or whatever you call it!! They even provide the software on a CD that lets you screw it up!! LOL


This weekend I'm hopefully visiting a mate round the corner who is going to let me loose with his MIG welder, & try to do a couple of the little welding jobs that need doing to frame!

Sunday, 1 April 2012

New Seat Mk2

I was never entirely happy with the seat base I made from the old Enfield seat, no matter how much it appealed to my sense of re-cycling!!

I was able to get a sheet of 16g steel from a friend, so I decided I'd have another bash at making a seat base.

Started off by making a cardboard template:


Then transferred the shape to the steel...


....& trim to shape with the angle grinder:


After putting a couple of bends in to follow the frame line, the fun started. Using my trusty claw hammer I started beating the shit out of the blank, to get the front end formed & create a turndown edge:


I ended up having to drill a hole & slit the edge to get the final shape to the rear end:


I bit more hammering & trimming & I am pretty satisfied with the result:


I will get the cut welded up to finish it off, & do a little more finessing & it'll be ready for painting & upholstery.

Update 3

Well, I let things slip again blogwise, & didn't get round to the third update! Breifly then, I have started to build up the front end as I finish cleaning & refurbishing parts, think it starting to come together:


The stantions actually look a lot better than I thought they were going to, so I'll probably dispense with the old shrouds & leave them 'nekkid!!'

Tuesday, 20 March 2012

Update 2

I wanted to clean up the switch gear as I'm reusing what I've got. Of the two sets I have one has an on/off switch for the lights & one didn't, of course the set I wanted to use (with the on/off switch) was the crappier of the two!! This bike is nothing if not a challenge!!


To remove the anodising which had faded badly I ended up resorting to some oven cleaner:


After about 45mins the anodised finish was all but gone, just needed to be scotchbrighted to get rid of the oxidised finish. Haven't got a photo so will need to get one of the finished item & upload it later!!

Monday, 19 March 2012

Update 1

Been a bit of a lazy git and not updated the blog for a while, but it doesn't mean that I've not been chipping away at things! While theres not heaps & heaps to report I'll break it into a couple of chuncks, for ease.

While I'm waiting for the engine seals I thought I'd press on with the front end. The brake calipers were as you might guess pretty crappy looking:


but a couple of hours with the paint stripper & wire wheel got it looking much better:


Even managed to get the bleed nipples out without snapping them off! Plenty of penetrating oil, gently heated the caliper body, & several sharp taps from Mr Hammer saw them out!

What is it with Japanese spares!!